· Steven Ohlson · Projects · 4 min read
Automated Chessboard
An intellegent chessboard that uses an electromagnet to physically move pieces and play against humans.

Bradley University Automated Chessboard
An intelligent chessboard that uses an electromagnet to physically move pieces and play against humans
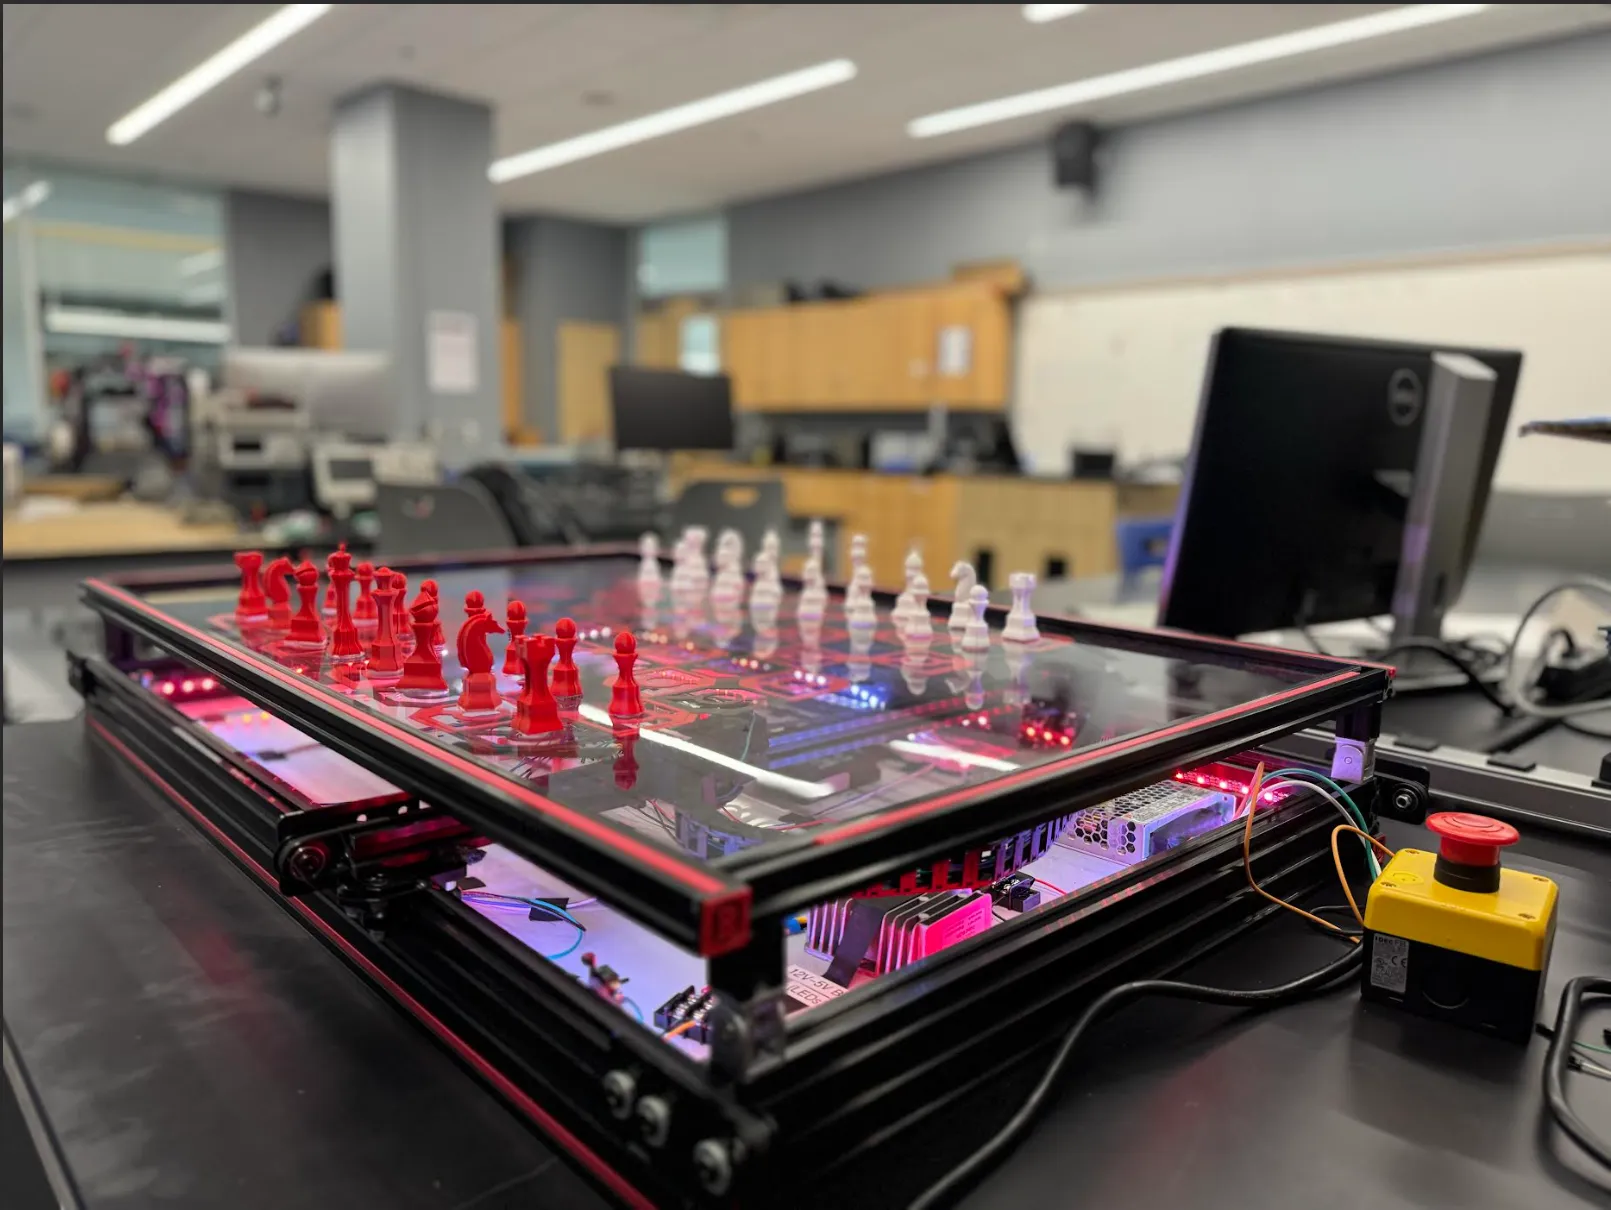
The chessboard is often called the “flashiest” project to come out of Bradley’s VIP program so far, and for good reason. While we aren’t the first, the idea of a device that uses magnetism to drag around chess pieces from underneath a board is quite a unique and fascinating premise for a project. Sensors below the glass surface will detect when the user moves pieces, which the processor can then use to inform its next move. The project has just finished its 3rd semester and is still in development, so not all planned features are fully implemented.
Mechanical Design
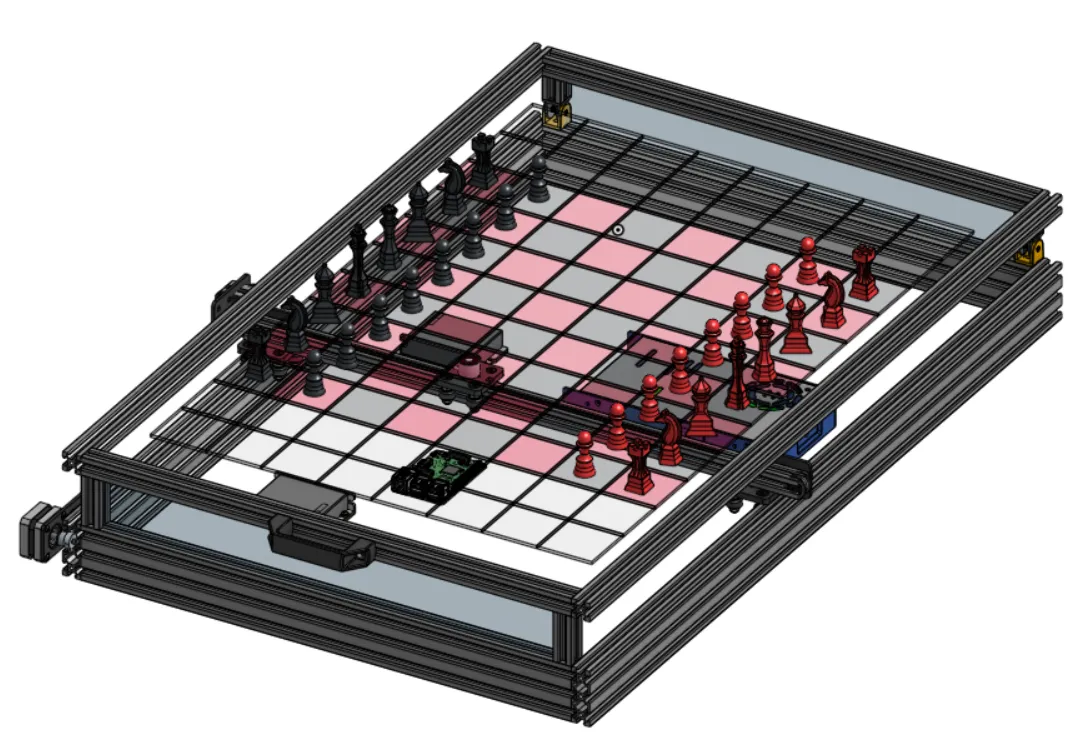
The main body of the board is built out of 2020 aluminum extrusion attached with blind joints. A plexiglass sheet is used as the bottom surface where all electronics are mounted. The top is a removable sheet of tempered glass where the magnet sensors will be secured. The electromagnet is secured on a CNC-like 2-axis gantry that is driven by two NEMA-17 stepper motors through belts. A couple of 3D prints are used for mounting limit switches and the cable chains which wires run through.
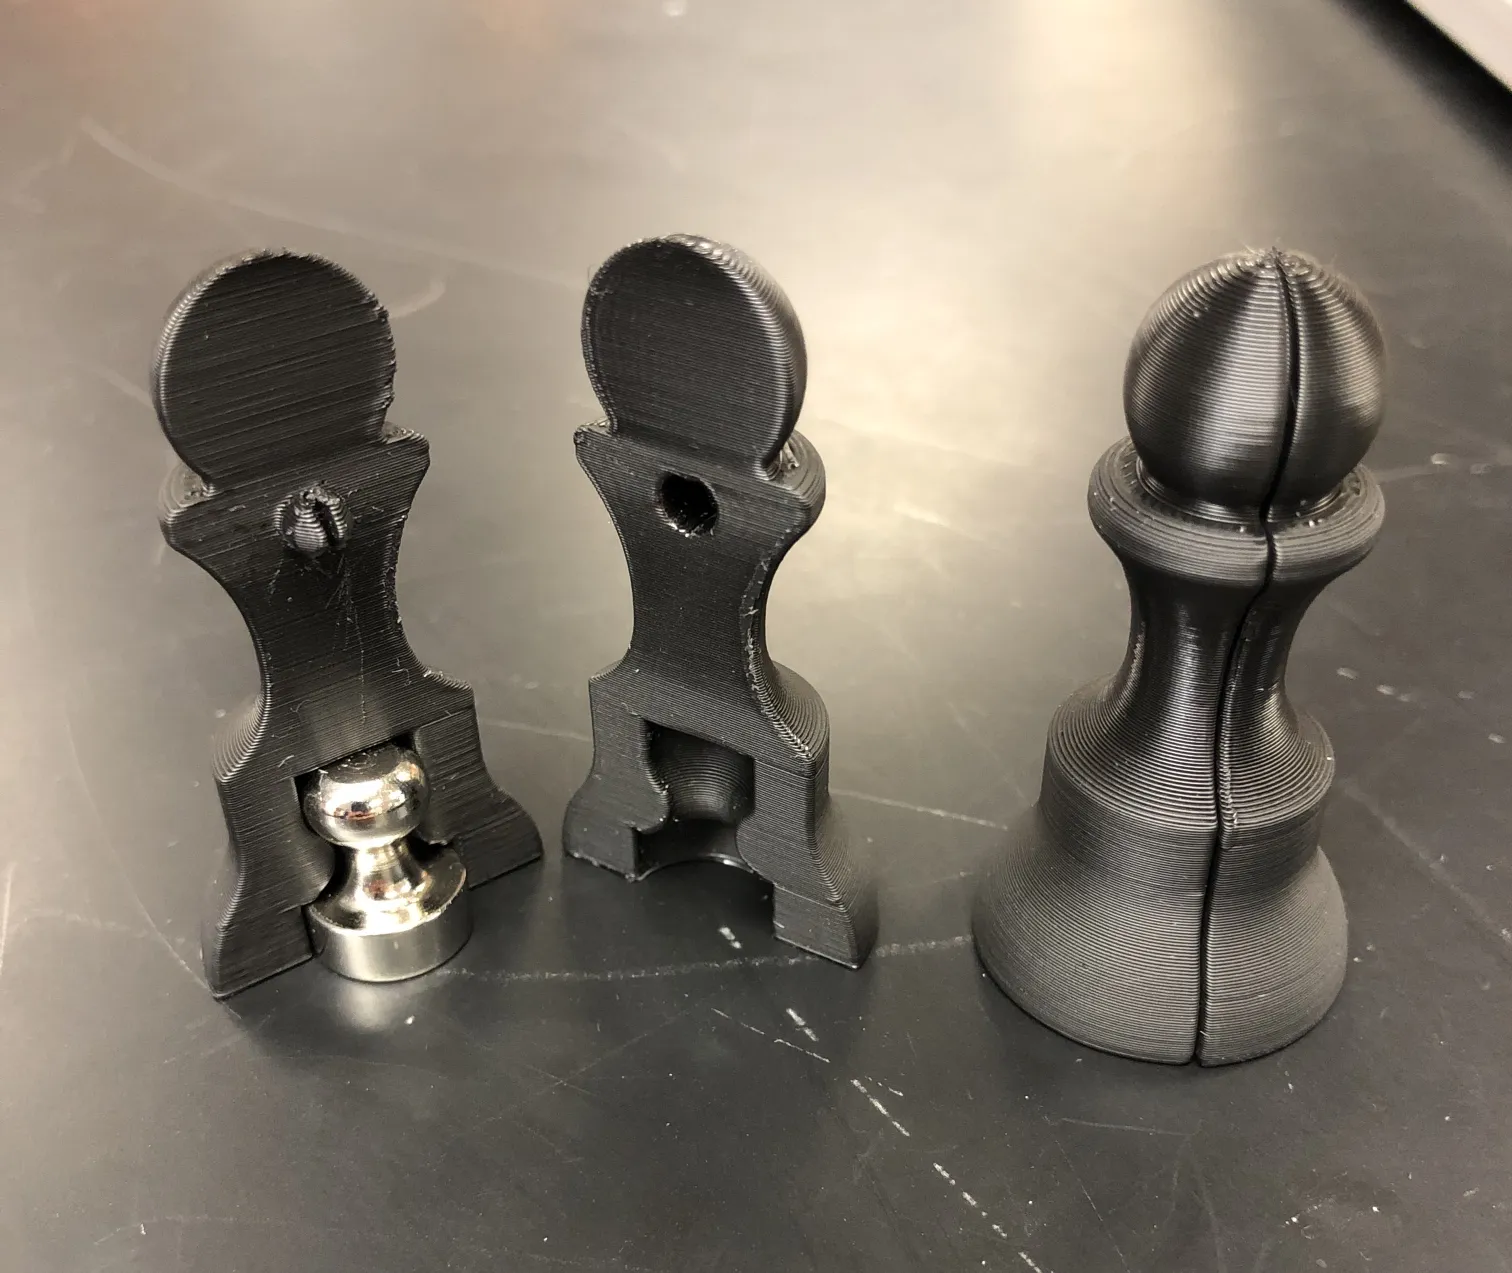
The chess pieces are 3D-printed in two halves that snap together to hold in a magnet and then have felt applied to the bottom to avoid scratching the glass.
Electrical Design

The following are all electronic components used in the current iteration of the chessboard:
120V AC to 12V DC power supply along with emergency stop button
Two NEMA 17 stepper motors and DM332T stepper motor drivers
12V electromagnet and L293D motor driver
Limit switches (for zeroing position and limiting movement)
Arduino Uno
Raspberry Pi 3B and 12V to 5V USBC buck converter
WS2812B addressable LED strip and 12V to 5V buck converter
Piece detection
At the moment, the chessboard has no sensors to detect whether a piece is on a space or not, but we have a few ideas.
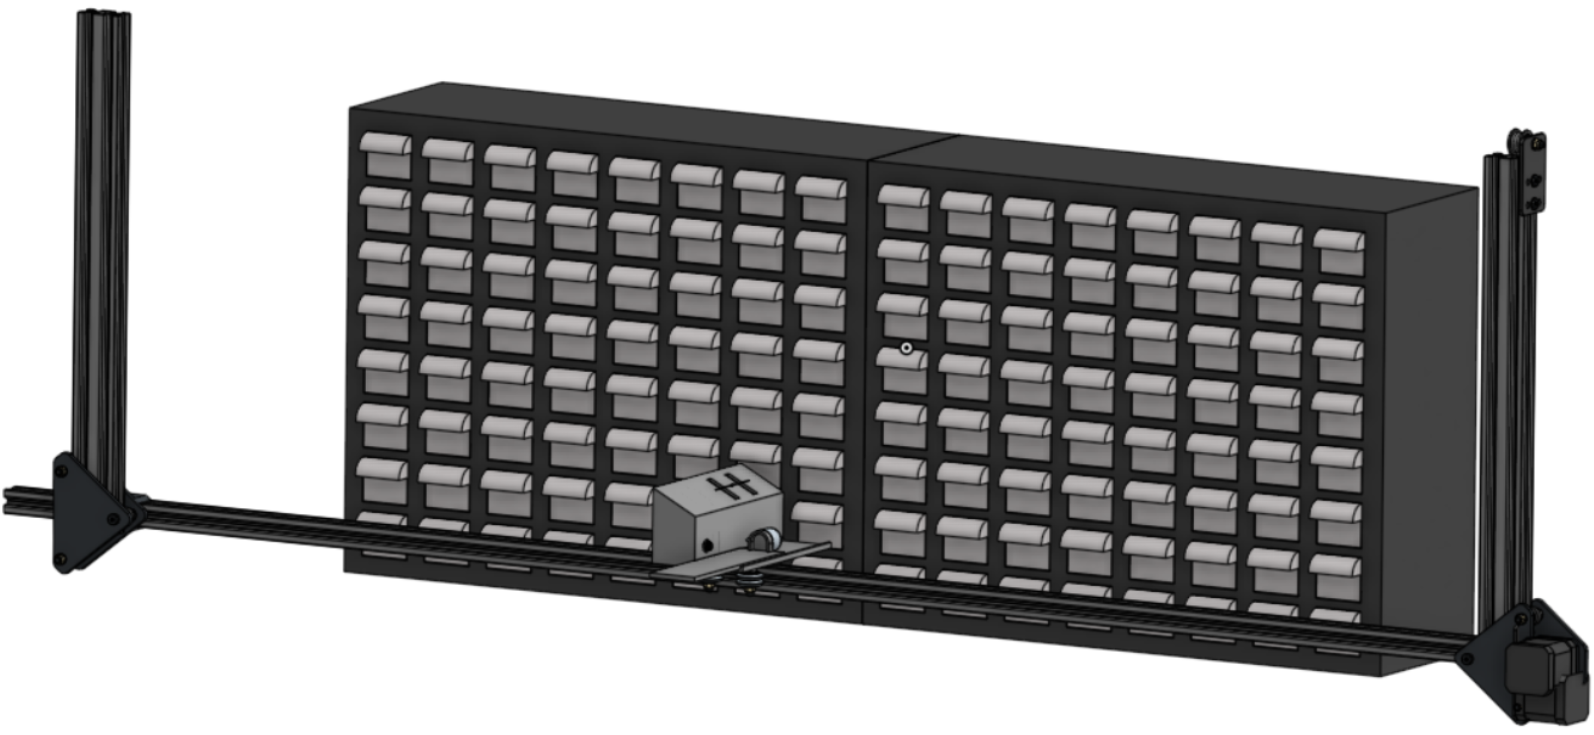
The first idea involves using devices called reed switches. Basically a reed switch is a glass tube with two metal contacts, and when a magnetic field is present, the two contacts flip together and complete the circuit. A grid of these can be wired in series with diodes as shown below. The Arduino can then loop through each column of the grid and read the rows to figure out which spaces are occupied.
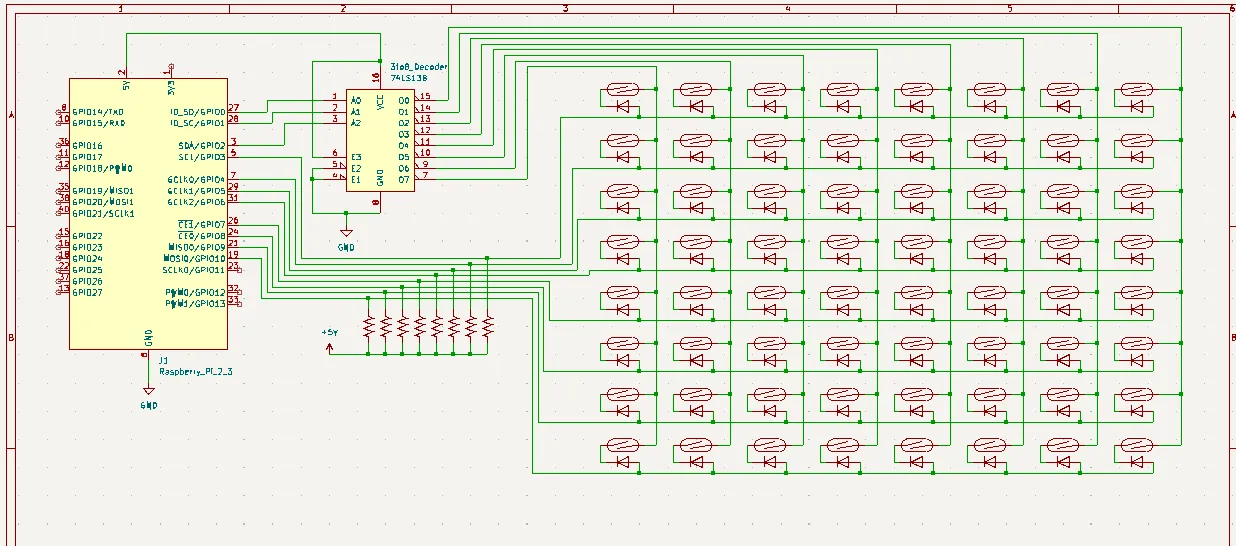
The wiring for reed switches is quite complex to do by hand, so we are also considering designing a printed circuit board with hall effect sensors (another type of magnet sensor) to tell piece locations. An extra advantage to this option is the ability to add LEDs to each square that light up based on the moves a certain piece can make.
Software
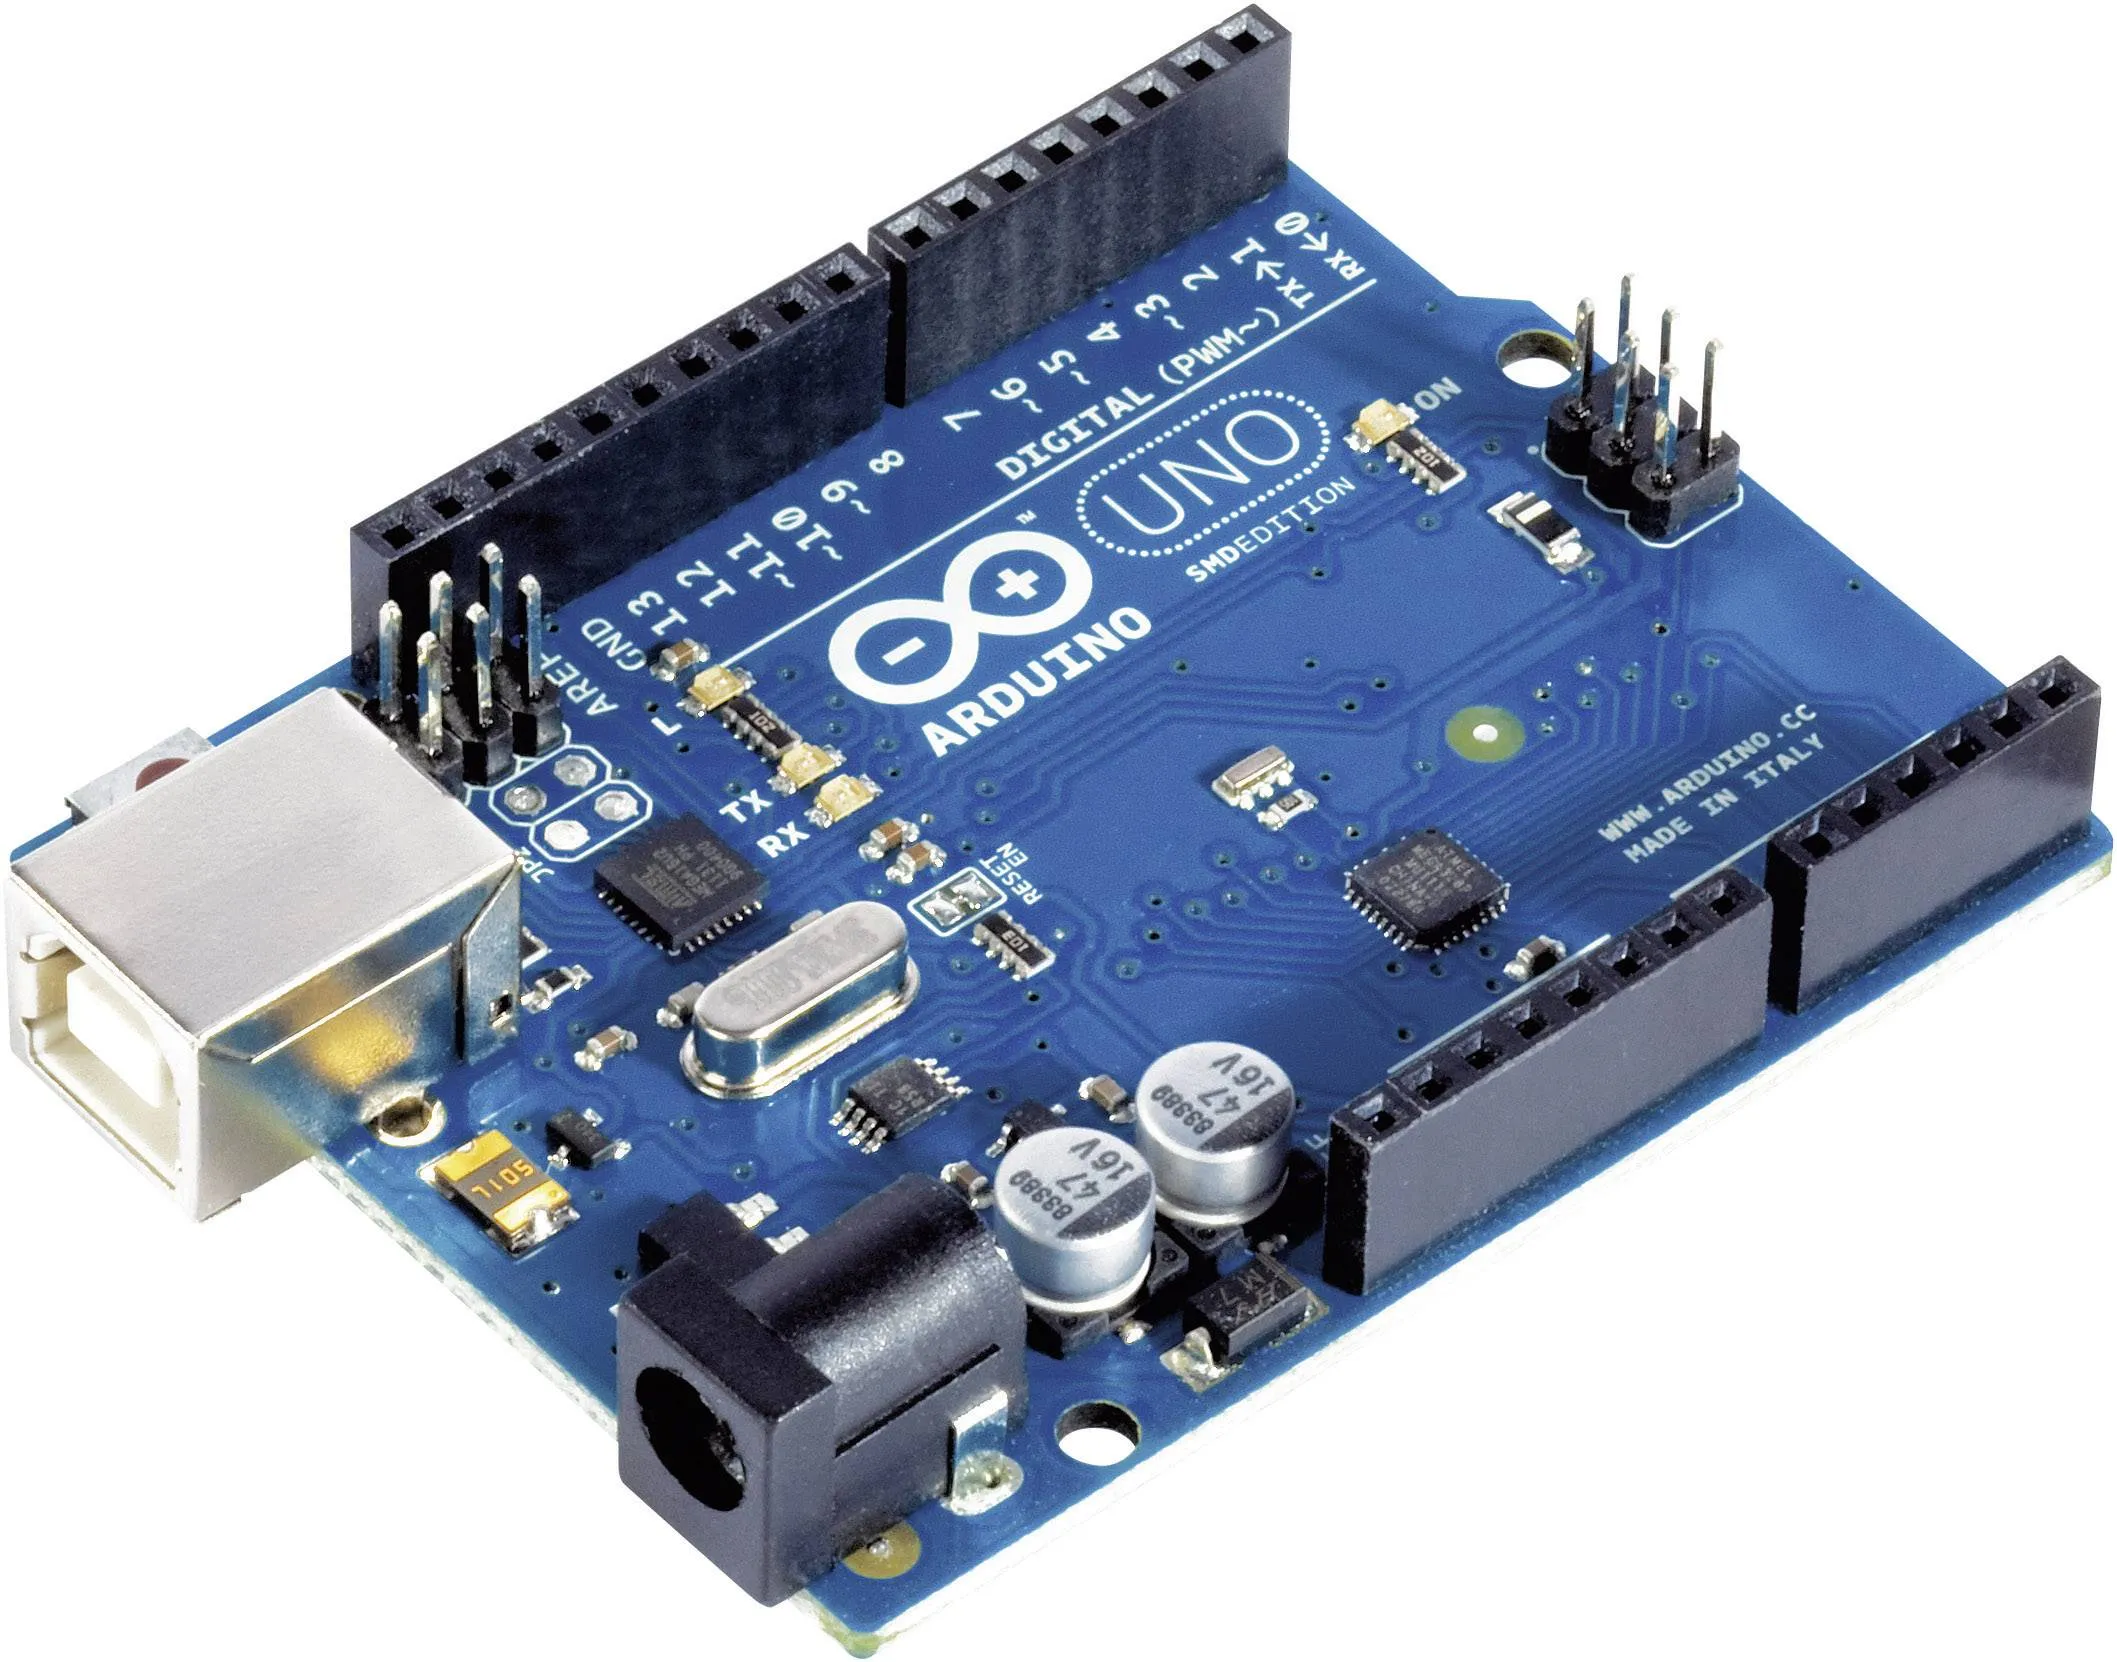
Arduino Uno (ATmega328P): Low-level Control
Our Arduino Uno is programmed in C with Microchip Studio and is responsible for all the low-level hardware control. So it is responsible for controlling the electromagnet, stepper motors, limit switches, and eventually the piece detection. It counts the number of steps it sends to the stepper motor and converts that to a real-world unit of distance, which it can use to move pieces between spaces on the board. The Arduino also controls the addressable LED strip.

Raspberry Pi 3B: High-level Control
Our Raspberry Pi is programmed in Python and is in charge of all high-level tasks. It is responsible for the chess engine and managing the state and difficulty of the game. It runs the chess bot/AI that the human will play against. Eventually, we hope to work with Bradley’s machine learning class to make our own chess AI. The Pi is also responsible for the user interface, which at the moment includes a character LCD and a rotary encoder dial for selecting difficulty or changing settings in a menu. The Pi will be connected to the Arduino through USB and will send commands to the Arduino over serial.