· Jacob Simeone · Projects · 3 min read
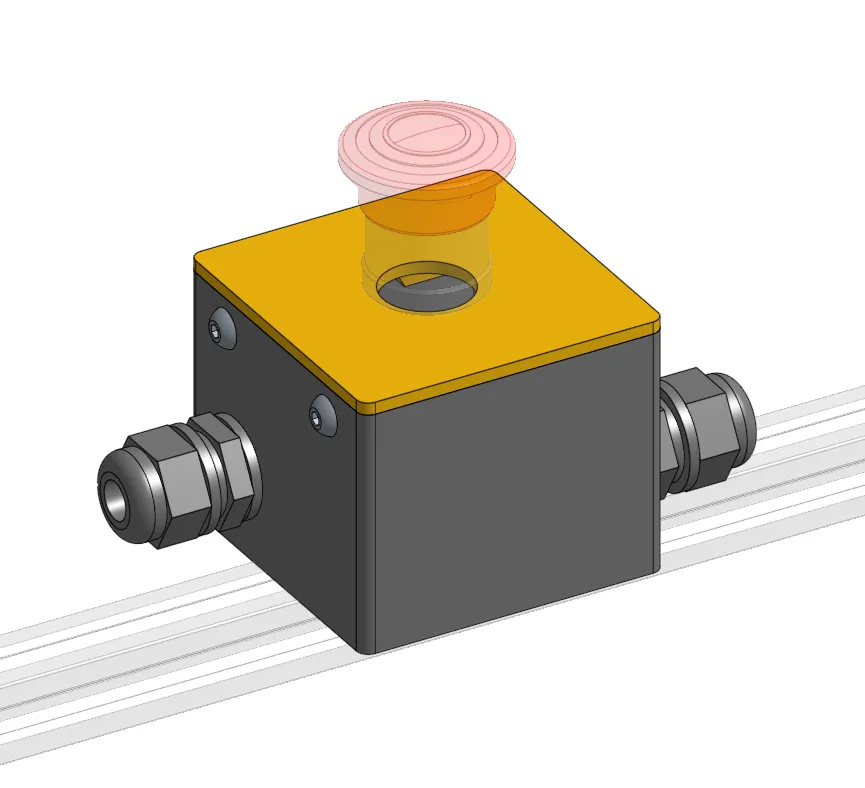
3D Printed E-Stop Button
ECE 398 Students Designed an E-Stop Enclosure for Standard 22mm E-Stop Buttons that Fits to 20mm x 20mm T-Slot Extrusion
Links
Why Print an E-Stop Enclosure?
The lab where our Vertically Integrated Projects class runs out of came into a few extra 22mm panel-mount emergency stop switches that did not have enclosures with them.
Typically, we would have ordered project boxes off of the internet to modify for mounting the buttons. The lab already has 2 Prusa Mk4S 3d-printers, used for rapidly prototpying other projects, so why not make our own boxes? Making our own standard e-stop enclosure cuts down on order times, as well as cost, as we already buy filament for the printers.
With all of that in mind, I set out to design a 3d-printed enclosure for these buttons that we could use in our projects. I came up with the following requirements:
Compatible with 22mm buttons
The enclosure is compatible with most 22mm emergency stop buttons.
Mounts to 20x20mm T-Slot Extrusion from OpenBuilds
We purchase most of our core structural components from OpenBuilds for our projects, specifically: the 20x20mm “v-slot” extruded aluminum. It would be nice if the e-stop box could sit free, or be mounted to the extrusion.
The Box Design
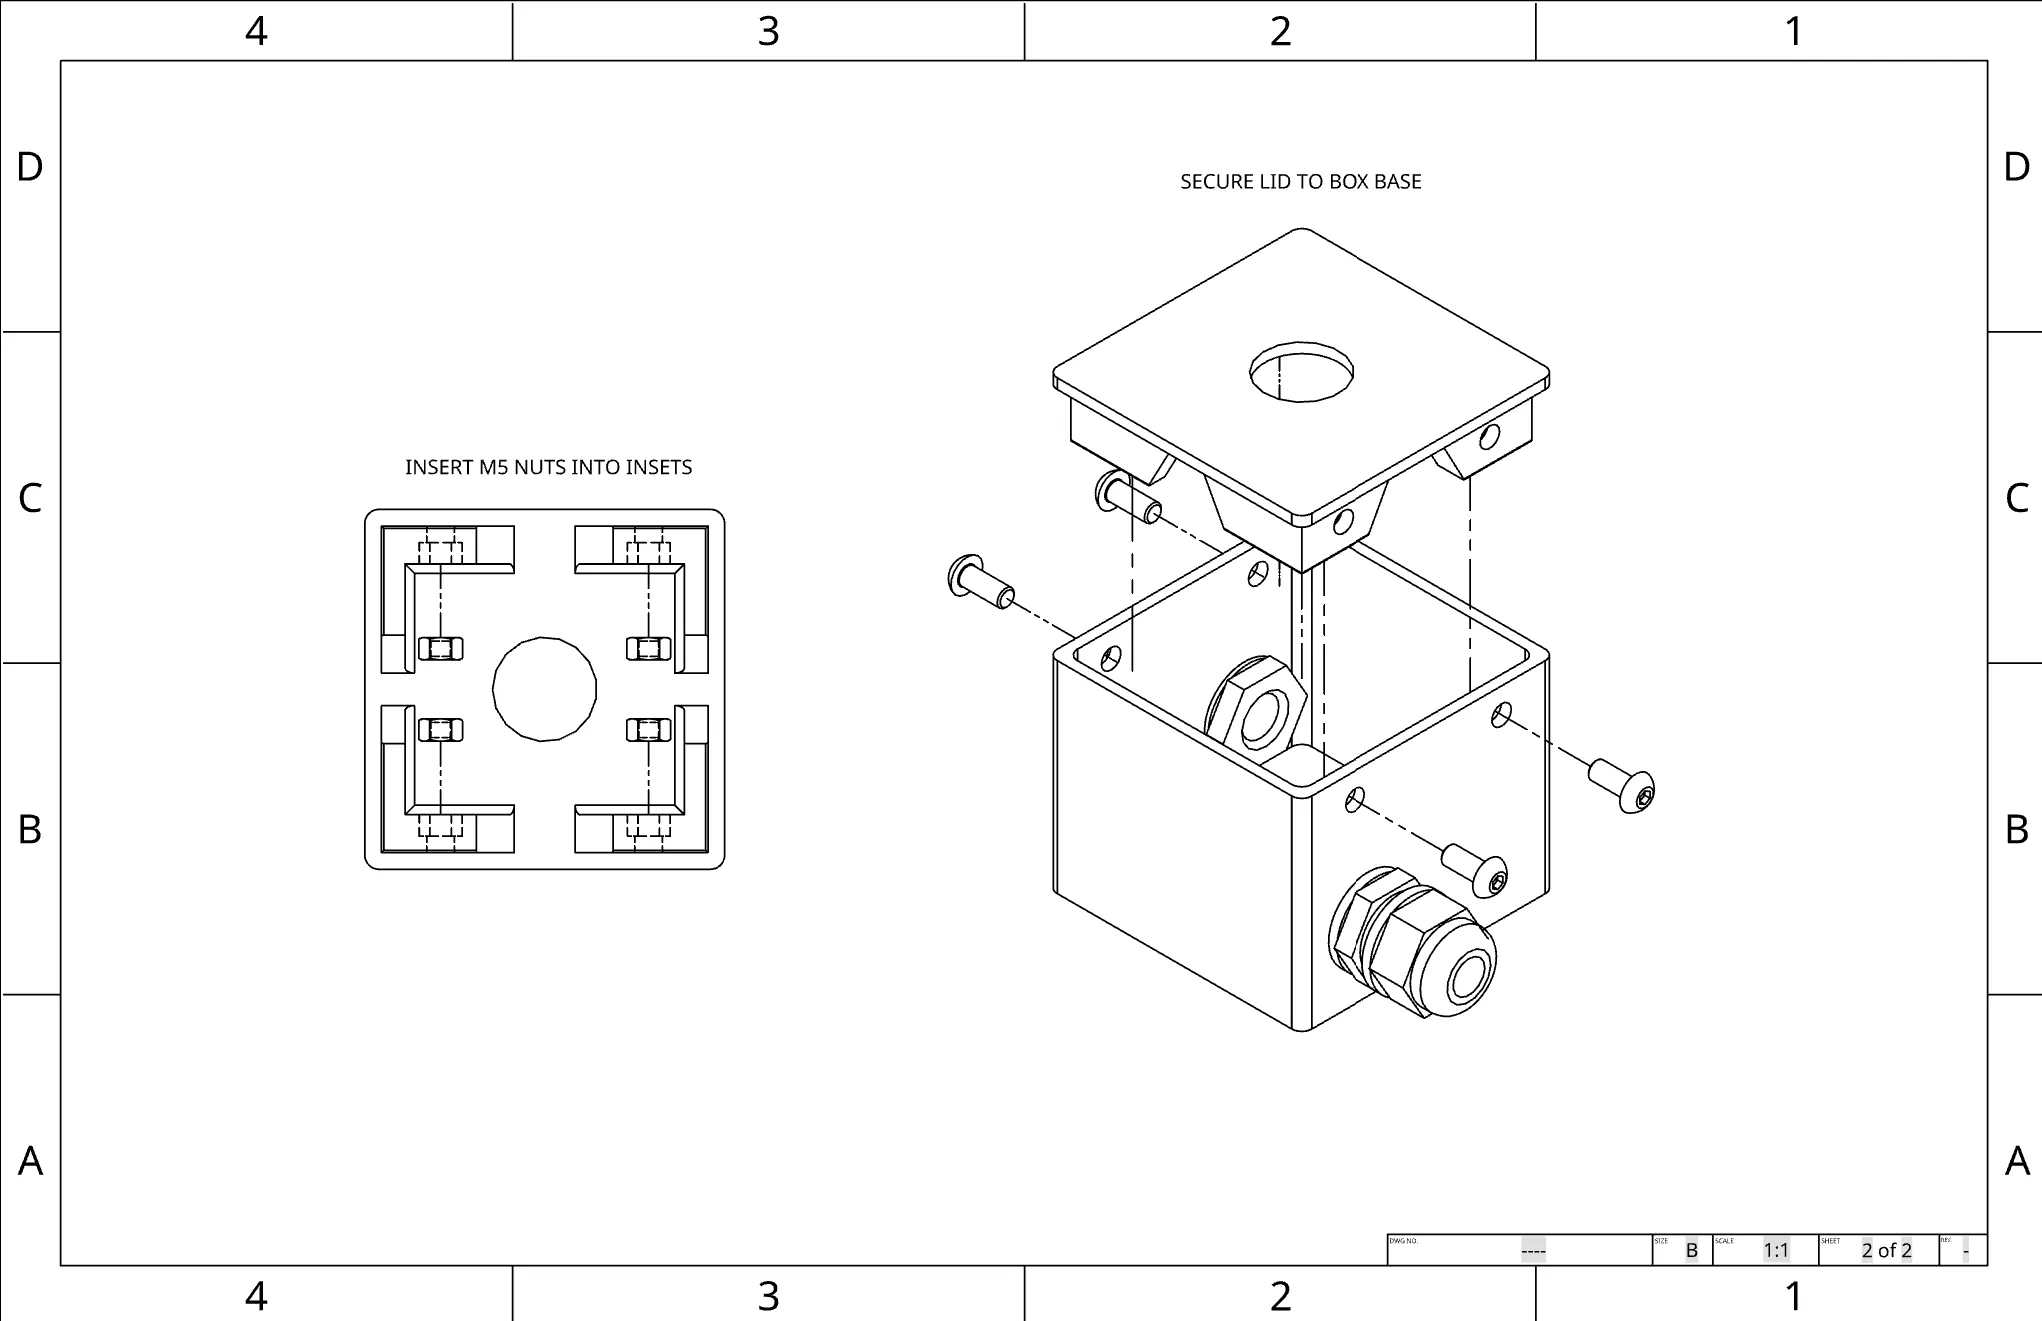
I designed the box uisng OnShape, a cloud-based CAD application. The enclosure is comprised of the box and the lid. The box has M5 clearance holes in the bottom for mounting to the extrusion, and similar M5 holes in the sides towards the top for moutning the lid to the box.
The lid uses press-fit M5 nuts that are threaded through the box to hold the lid on once the e-stop button is attached.
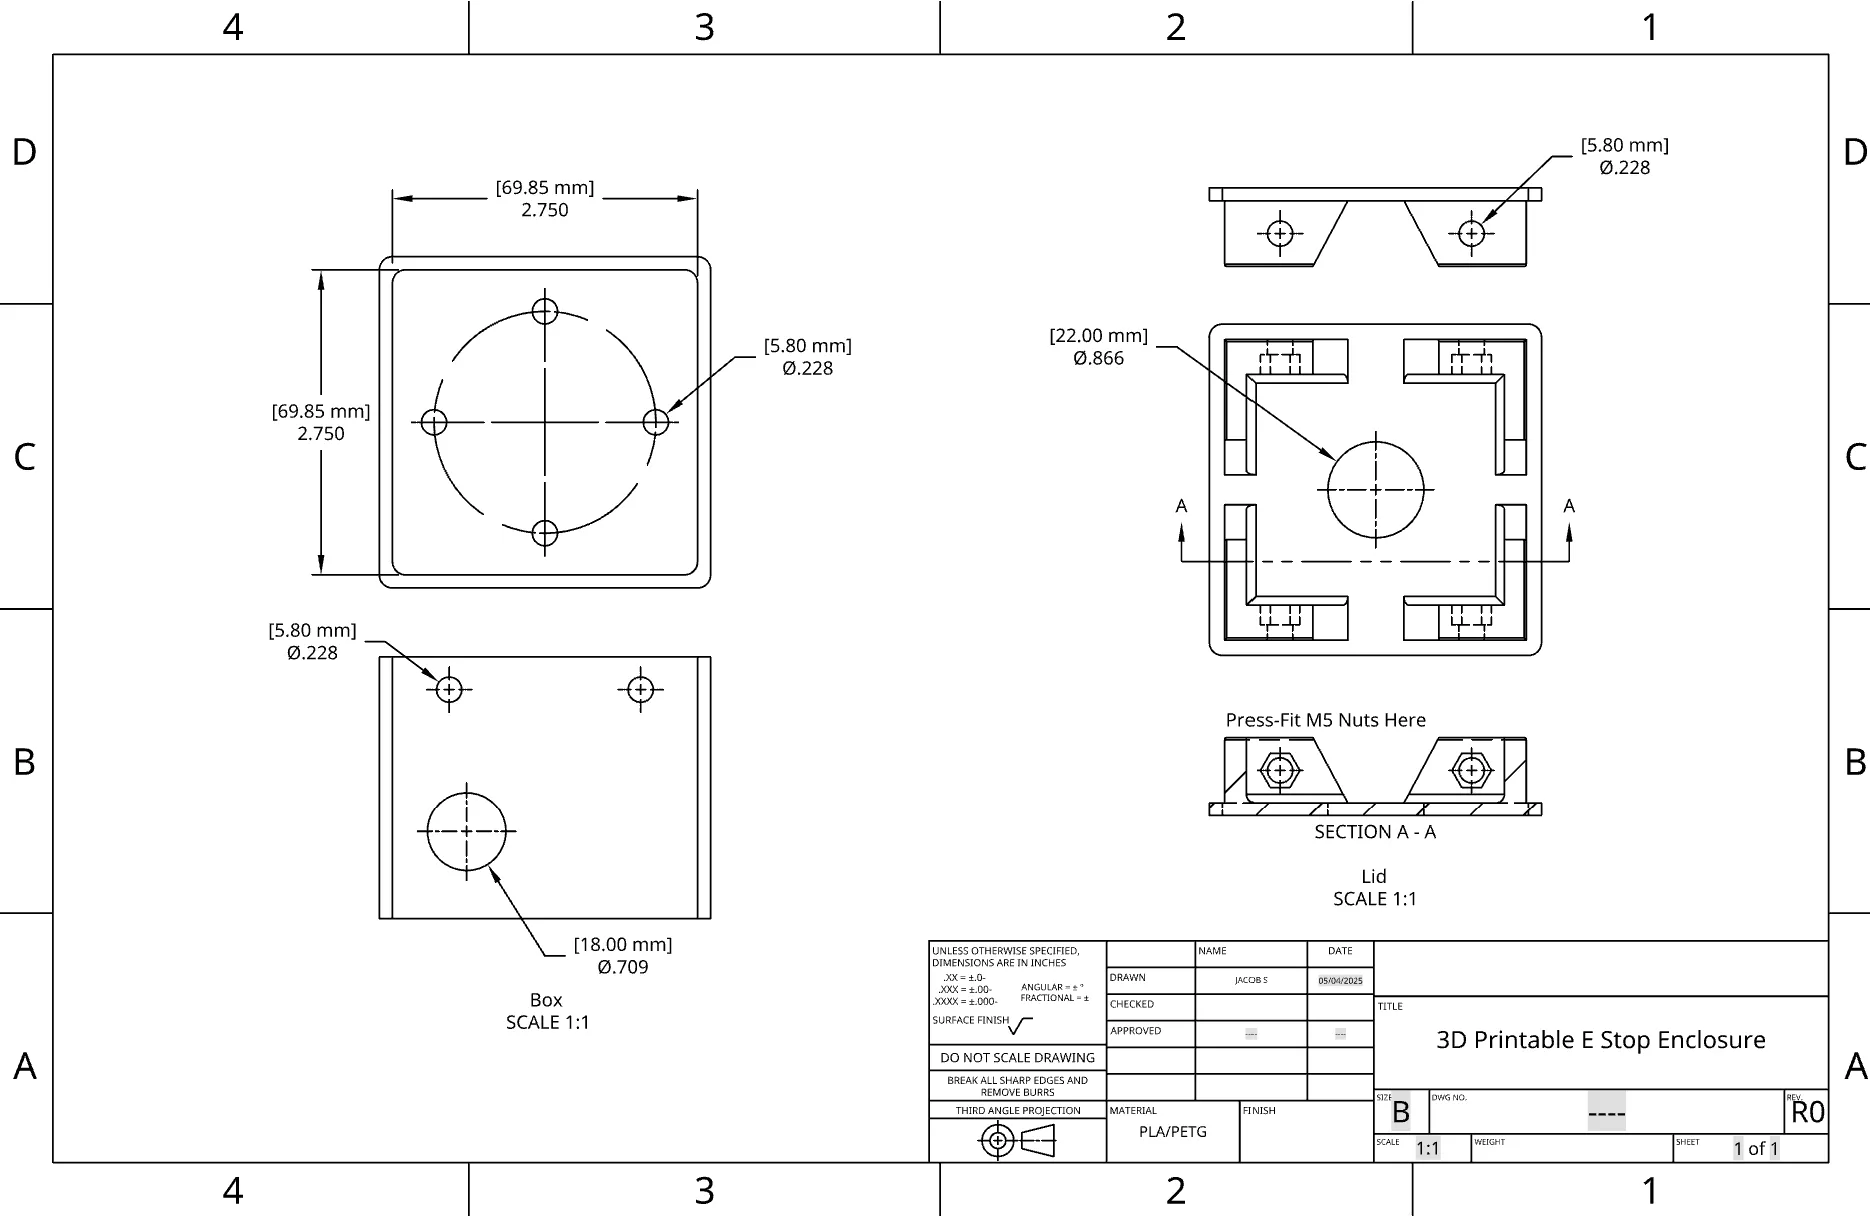
For wires entering the box, there are two 17mm holes that can accomidate 3/8” NPT cable glands. This gives the user the option to just route wires through, or use cable glands for weatherproofing / neatness.
The mounting holes on the bottom can be used to bolt through the box, into tee nuts, and secure the button to a base of aluminum extrusion
Assembly
Parts Needed for Assembly
- M5x8mm Bolts (6, 4 if not mounting)
- M5 Nuts (4)
- M5 Tee Nuts (2, 0 if not mounting)
Assembling the Box
- Insert M5 nuts into cutouts on the lid
- Attach the emergency stop switch to the lid of the box.
- If mounting the box, place M5 bolts through the bottom clearance holes into tee nuts, which can then slide onto extrusion.
- Insert lid into box
- Secure lid to the box with 4 M5x8mm bolts.
Results
The box came out to be much stronger than I had initially hoped, and works quite well. So much so I decided to post the design on Printables for all to use as a cheaper and more custom solution compared to buying an enclosure.